The humble bare stick, plentiful and coming in all shapes and sizes, is the building block of many winter making activities. We’ve spent this month at forest school collecting, carving and crafting them into simple decorations to celebrate the season. While many beautiful Christmas craft projects are so intricate they are only possible in the comfort and warmth of your own home, all the ideas below are tried and tested simple ideas to make outdoors.
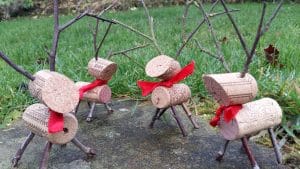
Cork reindeers – these cheeky little guys seem to delight young and old, and are a great idea for all those corks that somehow find their way into the house. Use a bradawl or small screwdriver to make holes in the corks to insert sticks for legs and neck. Find branched sticks for the antlers. Trim the legs down with secateurs afterwards to get an even length to make sure Rudolph can balance.
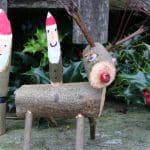
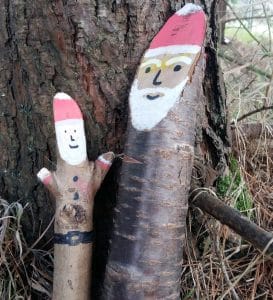
Log santas– on a trip to Germany a few years ago I saw birch log Santas outside all the houses in one snowy village. I’ve copied the idea back home with slightly smaller logs sawn at an angle. Children or adults can decorate the faces as they wish, (Deco-pens are great for painting on wood). One year we made our family in logs for our Christmas card.
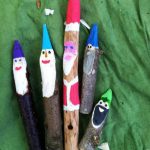
Stick santas – the log Santa idea downscales into an easy carving project for younger children, and you can use potato peelers as a safer alternative to knives. Take a green (i.e. fresh), straight, finger thick stick and carve one end into a diagonal point (always get children to carve downwards and away from themselves), then colour with Decopens or Sharpies as before.
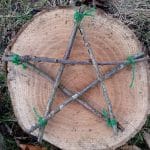
Stick star – This easy star only works if you believe in magic! Find 5 sticks of equal length and thickness. Tie about 20cm of string about 2cm from the end of each stick. Line up 2 sticks next to each other and tie together using lashing (round and round both sticks) then frapping, (round and round the lashing between the sticks), then tie off both ends. You will now have a V
shape of 2 sticks. Do the same again with the next stick so you have a N shape of 3 sticks, then a M shape of 4 sticks, then the final stick so you have a zig zag of 5 sticks.
This is where you have to believe in magic. Twist and weave the zig zag shape until it makes a firm star shape then tie the 2 ends together to complete your star. At first you may not be able to ‘see’ star within your zig zag of sticks. Relax and keep fiddling with it – the star is always there!